

|
Doe maar Gek,dan doe je al Gewoon Genoeg Soyez fou, c’est déjà assez Normale |


|
Legends quest |
|
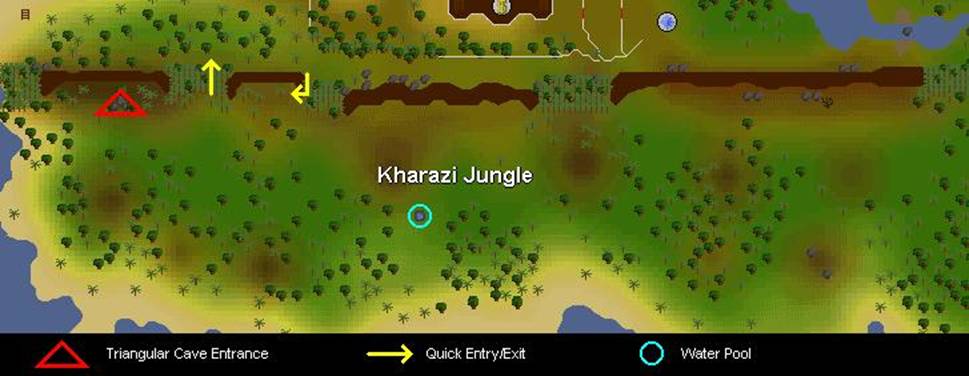
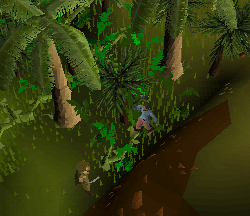
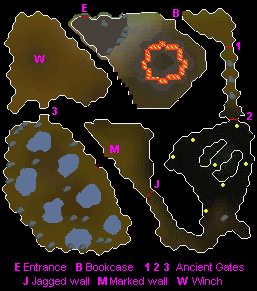
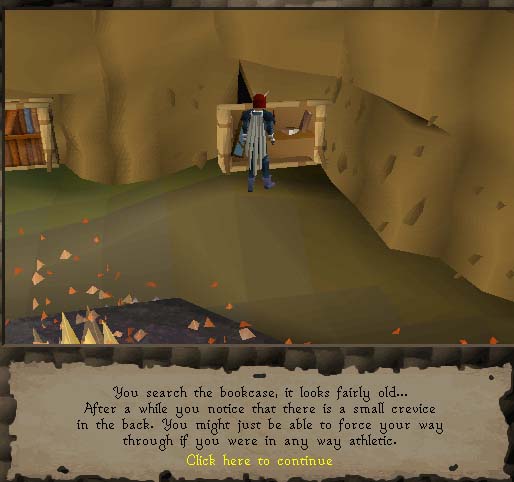
Description: Accept the challenge of the Legends Guild to map the Southern part of Karamja Island, make friends with the natives and bring back a prize to display in the Legends Guild Main Hall. Requirements: 107 Quest Points and must have completed Hero's Quest, Family Crest Quest, Underground Pass Quest, Waterfall Quest, and Shilo Village Quest. Difficulty Level: Very Hard Skills Needed To Start: Level 50 Strength, Level 42 Prayer, Level 56 Magic, Level 50 Agility, Level 44 Herblore, Level 50 Thieving, Level 50 Crafting, Level 52 Mining, Level 50 Smithing, Level 50 Woodcutting. Items: Charcoals, Lockpick, Pickaxe, 2 Gold Bars (more pairs can help), Hammer, Vial of water, Unpowered orb, Runes to Cast Charge Orb (any); Runes - 1 soul, 1 mind, 1 earth, 2 laws ("SMELL"); Sapphire, Emerald, Ruby, Diamond, Opal, Jade, Red Topaz; Rope Optional items: Silverlight, prayer pots (highly recommended), potion Super Set, Stat Restore, empty Vials, teleportation runes (fully charged dragon ammy helps to get back to shilo village). Carry at all times throughout quest: armor, hatchet (Rune hatchet required for Yommie Tree step 31), Machete (obtained during quest), Radimus Notes/Map (received during quest), food, and prayer pots Starting Location: Talk to Radimus Erkle in Legends Guild. Reward: 4 Skills of your choice to gain exp, 7650 for each skill choosen...... total = 30600 ., entrance to the Legends Guild and ability to wear Dragon Square Shield. [Also you can buy and wear the Legends cape and purchase Flower seeds.] Instructions: 1. Talk to Radimus Erkle in his office at the Legends Guild. You will receive 3 tasks to accomplish: complete a Map of the Kharazi Jungle, make friends with the Natives, and bring a symbol from the Natives back to the Guild. He provides the Radimus Notes. Search the cupboard and take the machete (can also be purchased in Shilo Village). Grab some papyrus from the table spawn or buy 3 at the general store in East Ardougne or Shilo Village. Either use a few coal over a fire to make charcoal, or purchase 2 or 3 at the Shilo Village shop (it can break while you draw). 2. Head to any Kharazi Jungle Entrance south of Shilo Village and talk to any Forester outside the jungle wall. He says that if you show him something impressive, he will give you a "special item." 3. Cut your way into the impressive jungle wall using a Machete and a hatchet. Do not forget the Radimus Notes. 4. Head back into the jungle and swing your Bull roarer and a Native named Gujuo will appear. * note: swinging the Bull roarer does not guarantee he will show up the first time; sometimes you will attract monsters or nothing at all. Talk to him and try to get friendly with him. He will tell you that he needs help to rescue Ungadulu. 5. Search near the jungle wall and you will see 3 rocks in a triangle [marked with red triangle on Kharazi Jungle map shown in Step 2]. Search any of the rocks and climb down. You may fail and take damage, so keep trying. 6. This is the first level of the dungeon. 7. Gujuo will tell you that only a bowl made of the metal of the sun will hold the water. Of course the metal of the sun is gold. Gujuo will make you a sketch of the bowl. 8. Take the sketch and at least 2 gold bars with hammer to any anvil. Use gold bar with anvil and make the bowl. Failing this will consume 2 gold bars. The next steps require the bull roarer, the golden bowl, lockpick, pickaxe, the SMELL runes and the 7 gems, in addition to the minimum Kharazi equipment of hatchet, machete and map. A prayer pot and a stat restore pot may be helpful, as well as some food. Armor is only needed to protect you from the random jungle enemies (listed in Step 3) and a small cave of Death Wings (level 83). Aside from these and Ungadulu, you may take small damage from agility obstacles. 9. Return to the Kharazi Jungle and Bull Roar for Gujuo. To bless the bowl, talk to Gujuo and you will do some funny singing. If you fail, you will lose some prayer; you need at least 42 prayer points to bless the bowl. Use your machete on a reed near the Water Pool (circled on map) to get a hollow reed. Use it on the water pool to fill your blessed bowl with pure sparkling water. 10. Head back into the cavern and douse the flame; search the desk and find the Shaman's Tome. Read it, but it does not help much. Now talk to Ungadulu. There's something wrong with him. He will throw you out of the octagon and reduce some of your stats. 11. Search the northeast bookcase and enter. 12. Use your Lock pick on the Ancient Gate and go slowly - do not break your Lock pick. 13. Proceed to smash the three boulders (requires pickaxe). If you fail, just try again. 14. Use your strength to push through the next Ancient Gate! If you fail, you will lose some strength; you need at least 50 strength points to get through. Notice the time it takes to get through the dialog while opening this gate; on the return trip you may be attacked by Death Wings (level 83) that you may have to kill before you will have enough free time to get through the dialog sequence. 15. Now go all the way south through the cave of Death Wings, then continue southwest and then northwest around the bend and jump over the Jagged Wall agility obstacle. 16. Further along the west side of this corridor you will discover a Marked Wall. Search it and you will get a riddle hinting what order to insert the runes to unlock the passage. The runes to use are 1 soul rune, 1 mind rune, 1 earth rune, and 2 law runes, which spells "SMELL". 17. Now pass through the Marked Wall to an area of 7 water pools with stalagmites. Use each gem on a stalagmite to find which one is correct - if it is not, it will say "Nothing interesting happens." There are no failure penalties, just keep trying. When you walk away after a successful placement, the game text says the gem starts to fade; this is normal. [For me the gem placement went in order of value from the diamond at the south pool, clockwise around the pools to the opal at the southeast pool. Just place them until they work.] When each gem is in the right spot, the gems will appear and glow to rebuild the Book of Binding. Grab it and read it - it tells how to defeat the demon. The below paragraphs explain how to enchant vials and make Holy Water. Note that this section is optional because most players fight the demon without doing this, and the few people who have done it were unimpressed with the performance of the Holy Water (it hits no better than a dragon baxe). The last pages of the Book of Binding concern enchanting empty vials to fight the demons. On the last page click on the bold word "Activus". It then asks how many vials you wish to enchant. Be warned: enchanting consumes 5 prayer and 4 magic for each vial! 18. Now head back to Ungadulu and prepare for battle. Equip Silverlight or your Holy Water vials, drink your Super set now, and then use the Book of Binding on Ungadulu. A level 187 demon will appear and he will attack you, draining your prayer right away. Drink Prayer potions, then turn on Protect from Melee for this battle. 19. Ungadulu will reward you with some Yommie Tree Seeds. Talk to him and ask how you could get out. He will bespell you to protect you against the fire. 20. Try to get water from the pool; you will see it is filled with murky water. (You may have to germinate your seeds with holy water before the pool becomes murky.) Bull Roar for Gujuo. |

